Free Fast and Easy Box in a Card Tutorial
- Sharni Haines

- Nov 19, 2021
- 4 min read
Hello lovelies,
want to know how I made this Box in a Card? The design has been around for a long time but I haven't made one forever! So, I thought it was time to have a bit of fun with this fail proof design and share it with you.
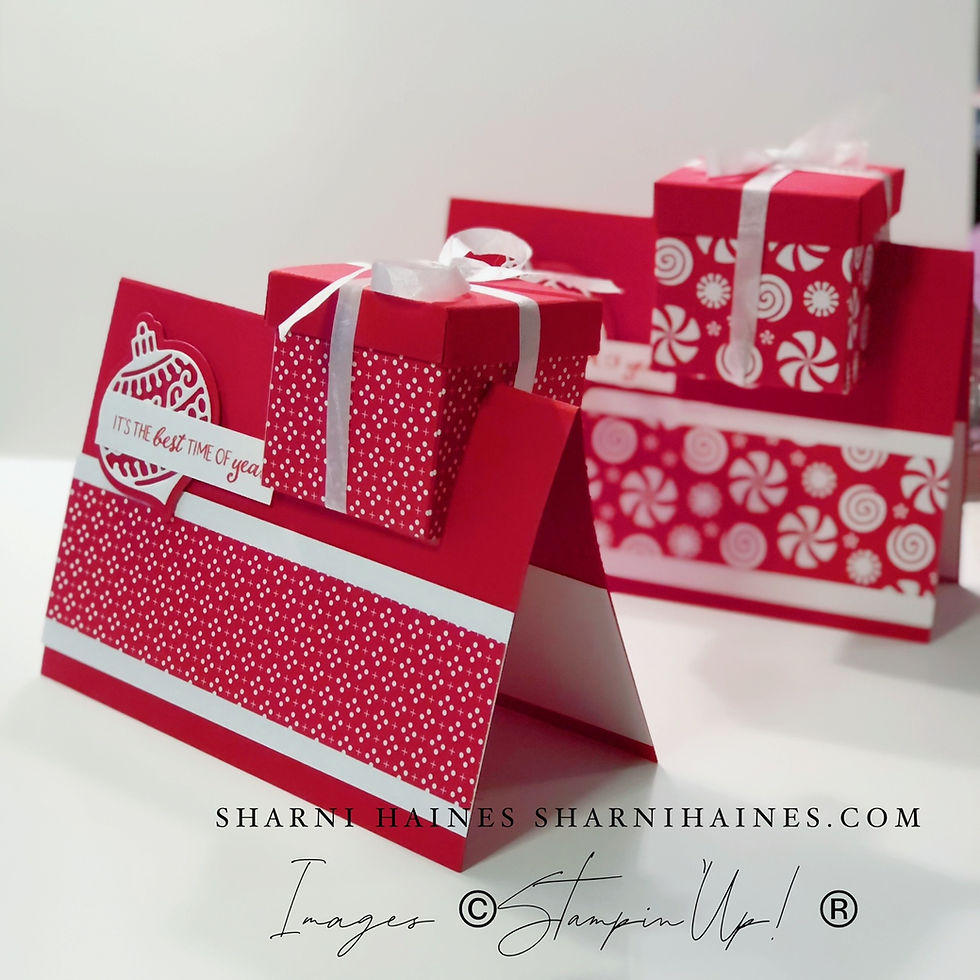
I have used the Heartwarming Hugs Designer Series Paper 12"x 12" (DSP) for the card in the front and the back one I used Gingerbread & Peppermint 6"x 6" (DSP). Both are from the Mini Catalogue that will retire the end of December.
TUTORIAL
Card Base - a normal standard card size you make normally (for your country) (Australian size card base is an A4 piece of cardstock cut in half at 8-1/4" or 8.4" x 5-7/8" or 5.14" (21 cm) and then scored in the middle at 4-1/8" or 4.2"(10.5 cm).
NOTE:
(American cardstock is 8-1/2″ x 11″ (21.6 cm x 27.94 cm), different to Australian A4 which is 8-1/4″ x 11-5/8″ (21cm x 29.7 cm).
Cut and score a cardbase in the colour of your choice.
BASE OF BOX- Cut a 6"x 6"(15.2 cm x 15.2 cm) square of Designer Series Paper and score at 2" & 4"(5 cm & 10.1 cm) on two sides so you have 9 squares.
Fold & burnish the score lines with a Bone Folder, then cut along the lines shown in the diagram 1. below.
BOX LID - Cut a 3-1/8" x 3-1/8" (7.9 cm x 7.9 cm) piece of Cardstock (that matches the cardbase colour). Score at 1/2" (1.2 cm) on all sides. Fold & burnish the score lines with a Bone Folder then cut along lines shown in diagram 2. below.
Assemble both box base & lid and adhere with liquid glue.
Cut out a square from the card base - make two cuts from the top of the card 1" (2.5 cm) in from the right hand side down 1-1/2" (3.8 cm) deep. Repeat for the second cut allowing a 2"(5 cm) space. See video for more details. Diagram 3.
Decorate your card - Cut 2 Basic White Cardstock strips of 2"x 5-7/8"(5 cm x 14.9 cm) - whole length of your card front.
Cut a strip of DSP 1-1/2" x 5-7/8"(3.8 cm x 14.9 cm).
Adhere the DSP to one strip of Basic White and adhere to the card front, add the second piece of Basic White and glue inside the card for your message.
Die cut a Christmas bauble from the Gingerbread Dies (I used Real Red & Basic White), assemble the two pieces.
Stamp a sentiment on some spare Basic White with Real Red Ink and adhere both the sentiment & Bauble to the card front using Stampin' Dimensionals.
Tie a piece of Crinkled Seam Binding around the box once you have filled it with goodies and slide into place on the card.

Diagram 1. BOX BASE
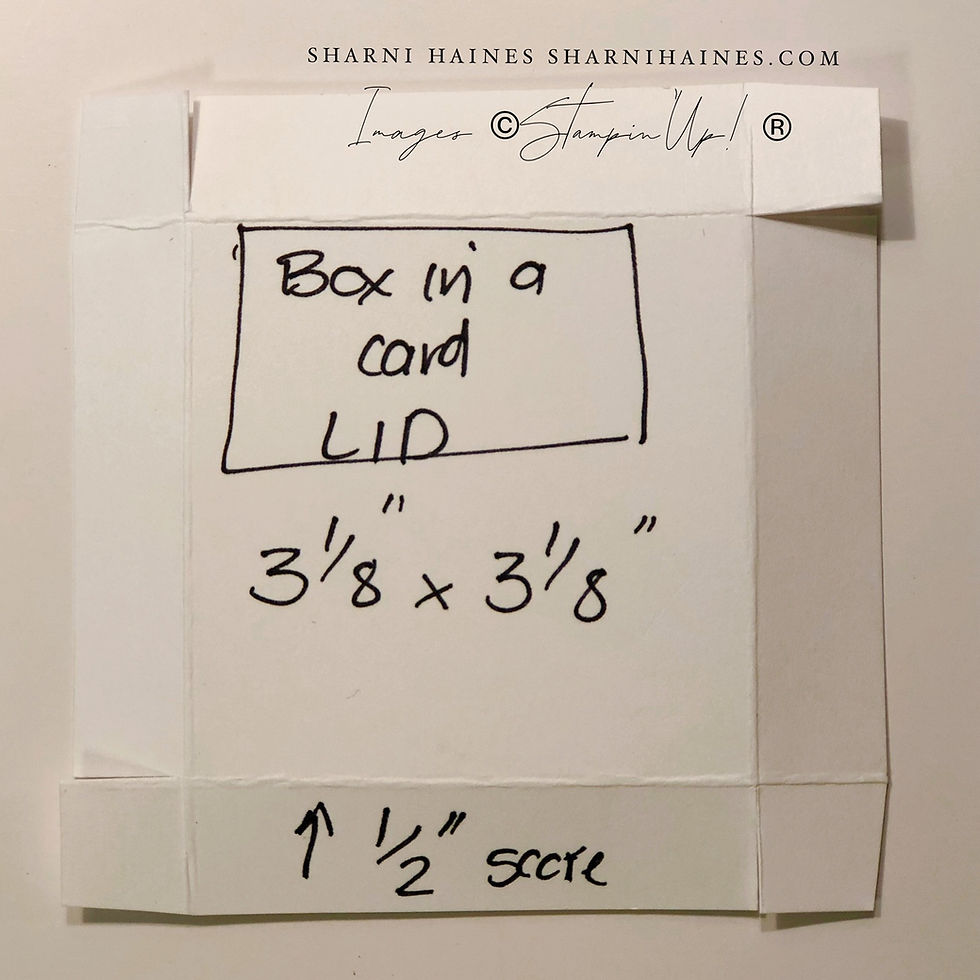
Diagram 2. BOX LID
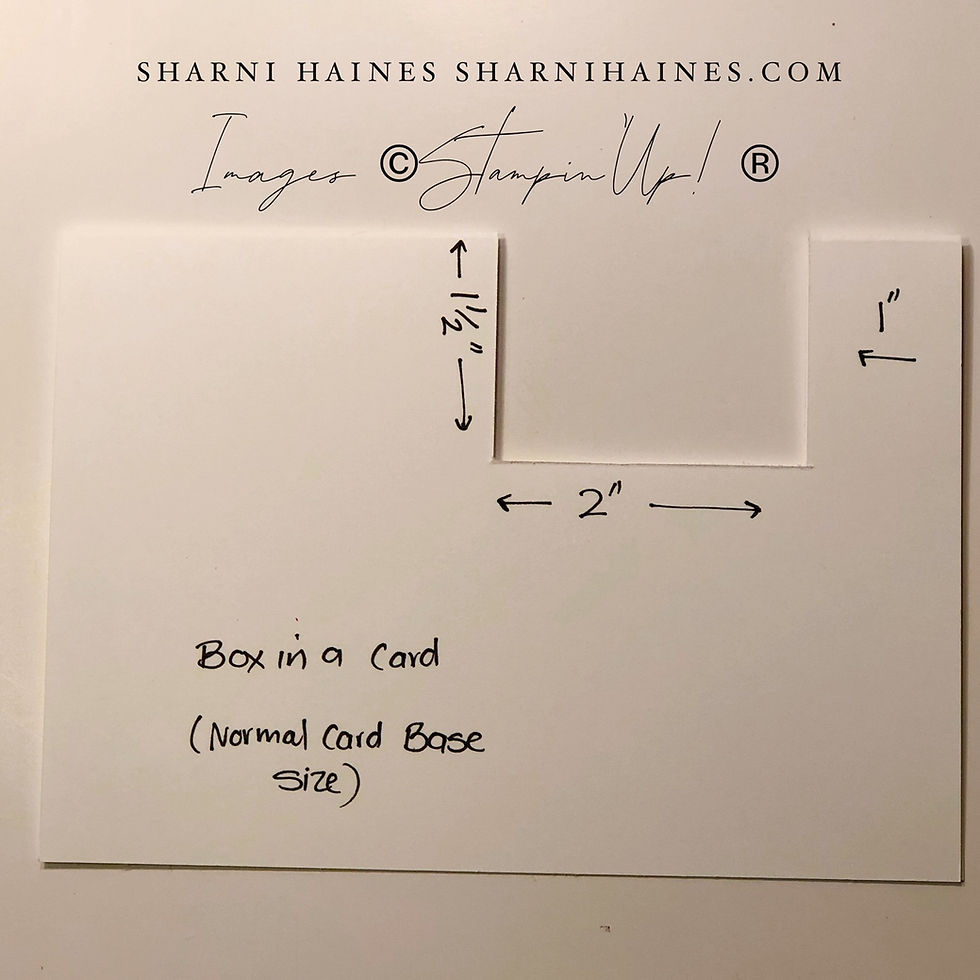
Diagram 3. CARD BASE


I hope my crazy instructions have helped you create a beautiful and fun gift for someone special!
I have created a video tutorial (which I always find easier to understand!
Well that's all from me for now, thanks so much for popping by enjoy your day and don't forget to keep hopping around to see what lovely projects everyone else has made.
loves and hugs.
SPECIAL!!!
I have two of these super cute Loaded Pockets to give away as a draw prize for my November customers! (Australian). With every order over $50, I will put your name into a draw to win this super cute Loaded Pocket with all the goodies inside. Yippee!


* Join my beautiful Angel team Here.
* Watch my Tutorials on my You Tube
* Want notifications sent to you with my new Blogs? Here
* View the Annual Catalogue
* View the July-December 2021 Mini Catalogue
* Go to my online shop
SOMETHING FOR YOU - November 2021
Thank you gifts from me when you order over $50
a thank you gift of the 2021-2023 In Colour Jewels (valued at $12.25)
a beautiful hand made card by me
The Fabulous Dimensionals 3D Tutorial Bundle
Go into the Draw to win one of two Loaded Pockets.
When you order over $90
a thank you gift of the 2021-2023 In Colour Jewels (valued at $12.25)
a beautiful hand made card by me
The Fabulous Dimensionals 3D Tutorial Bundle (valued at $15)
18 Card & Paper Project Tutorials from the Stampin Glam Squad!(valued at $28)
a card kit with tutorial
I will send your free Tutorials at the end of the month.
Tutorial Bundles for Sale
1. The Dimensionals Tutorial Bundle - $15
A little something special for you...I am fortunate to be part of a fabulous design team who create beautiful 3D projects each month. These projects are available to you as a lovely bundle for the cost of a coffee & cake..but last much longer!
(They are yours FREE with an order with me over $50 or if you are one of my FABULOUS team members.)

Purchase your Tutorial Bundle HERE $15 AUD (This link will take you to Bronwyn's Shop). (The exchange rate will be altered for International residents).
( All graphics for The Dimensionals are from the PNG Tree.)
2. Stampin Glam Squad Tutorial Bundle - $28
I am so excited to be part of the Stampin Glam Squad! Every month the design team creates original designs for you to make with current products and easy to follow instructions. This October there are 18 beautiful projects: just waiting for you to create! (They are yours FREE with an order with me over $90 or if you are one of my FABULOUS team members.)


Purchase your Stampin Glam Squad Tutorial Bundle HERE $15 AUD. (The exchange rate will be altered for International residents).
Products I used today. You can find in my online shop.
Life of Charlie

Rest day - we are both feeling a bit tired out from yesterday's big gardening day!


.jpg)
.png)
Comments